Category: edci336

This is a category for the EdTech course. Please add this category in addition to the relevant edtech assignment category(ies).

Sourdough – Reflection

Coming to the end of this term, I wanted to do a reflection on how my sourdough inquiry has gone and what it’s revealed.

As a reminder, these are the main questions I was asking going into this process:

  • What makes a healthy, happy starter
  • How using different types of flour in two different starters affect the flavour of the loaf(s)

I’ll go through them one at a time to share what this inquiry/experiment has taught me through my hands-on experience working with sourdough.

What makes a healthy starter?

Time: For the first few days not a whole lots happened much happened. By the end of the first week I was seeing some action – they were looking a little more airy and I could see that they had risen and dropped a little bit. But it took about 10 days or so for me to see and smell a happy, living starters.

Temperature: This was the biggest constant struggle I had to keep in mind, even after I had established starters. I keep my house a bit on the chilly side, which I have come to learn that sourdough does not love. Sometimes, after feeding, they would not be as active as I thought they should be. I changed the spot that I kept the jars to places that gave off a bit more heat and that seemed to help keep them more lively.

Consistent feeding: Oops!  During some of the busier times of the term I definitely neglected my poor starters a bit. There were a few times when I had to revive them – luckily they pulled through each time.

How do different types of starters affect flavour?

Throughout this whole process, I maintained one starter that was made of only unbleached all-purpose flour, and one made of only red-fife whole wheat. Everything I made (with the exception of the last two bakes), I made one using each starter so that I could take note of the flavour difference between the two. This has been the most interesting and fun part of the inquiry, and this is what I’ve found…

All-purpose:
In general, the AP starter consistently produced a more true sour flavour, which I prefer. The sour flavour was cleaner, brighter, and pretty tangy. It offered a sweetness to the sour taste, often with hints of buttermilk or yogurt.

Whole-wheat: 
The whole-wheat starter performed pretty steadily, almost always offering up the same notes each bake. It gave off a mild, but still detectable, sour tang. The main flavours that shone through from it were a hearty, grainy, saltiness that, at times, was a tad overpowering in certain baked goods.
The result of the whole-wheat sourdough bagels was the only bake that revealed a bit of a nuttiness along with it, which was a fun twist.

Final Thoughts

Having these flavour profiles laid out, I can now pick and choose which starter I feel appropriate for which baked good. For example, croissants went beautifully with the AP starter, while the whole-wheat bagels were a favourite at our house.

Overall, I’ve had a blast with this inquiry and will absolutely continue trying out recipes. All of this will now be made a lot easier, as I have more knowledge about sourdough care and use than when I first started.

-Megan B.

Online vs. In-Person schooling

I’m going to be honest, doing classes online has been a toughy. While I’ve really enjoyed the classes themselves, there’s been a lingering feeling of negativity around all of these zoom meetings for me.  Today’s tech class offered a boost in my attitude towards it by breaking down both sides of online vs. in-person learning.

I’m going to breakdown the pros and cons of online learning below, sharing some logistics of it as well as personal opinions towards it. I’ll start with the cons, as I’m feeling a lot of those, and follow up with the pros to remind myself how online learning can actually be pretty darn great.

Cons
  • No commute
    This may be a pro for some people, but I’ve always really enjoyed by bike commute. It’s a great way to start and end the day and I really miss it.
  • So much sitting
    I really have to remind myself to get up for walks, otherwise I find myself in one spot the whole day.
  • Technical difficulties
    Like with any technology, glitches and wifi issue happen.
  • Zoom fatigue
    I magically thought I could avoid this, but it is a very real thing.
  • Physical strain
    Because of many of the points listed above, my body is not happy. Not having to leave the house and sitting at a computer all day for classes and homework is a great way to have a sore body, strained eyes, and frequent headaches.
  • Personal interactions
    There is something about talking to someone in person that just feels better sometimes.
Pros
  • Accessible
    As long as a student internet, online classes can be accessed from wherever they are.
  • No commute
    What? I thought this was a negative? Well, after reflecting on it, it’s both. Having an extra 30-60 mins per day to work on schoolwork, especially during busy times, is a plus.
  • Asynchronous and/or synchronous
    Having options on how to present content can offer accommodation for many situations and is a nice way to switch up teaching/learning.
  • Quick group work within synchronous classes
    Breakout rooms have proven in our own classes to be a great tool to quickly get students into random or assigned groups. From last year, many of us know that doing this in person takes much longer and does not usually happen as smoothly.
  • Meeting everyone
    Having classes online and using random breakout rooms is a great way to meet everyone in your classes. In-person, people often sit in the same spots and group together with the same people, so this helps create a more together, whole class.

Seeing as we will likely be doing classes online for at least another semester, my end goal of this post is to act as something that I can come back to when I feel online classes wearing me down again.

How Coding Tools Can Be Used For More Than Just Coding Education

As society continues to move toward a more technological future, coding has become more and more prevalent. Teaching coding in the classroom encourages the development of a relevant tech skill that has an ever-growing job sector. Computer based jobs are one of the most rapidly expanding sectors of the workforce, and it’s projected that, by 2026, this sector will have grown by nearly 20% in the past 20 years. 

While coding offers the benefits of a new, relevant skill, it is also a medium that can be used to boost learning in other subject areas. Introducing coding at an elementary level promotes math skills (such as problem solving and detecting patterns), literacy skills (similar to learning a new language), and creativity/storytelling skills (through creation in this new medium). Our group has explored these three skills, finding out how coding can be used to teach and develop these areas, thoughtfully and successfully.  

Pros and Cons

When introducing a new method, program, or unit to the classroom, it’s important to be able to predict (as best as we can) the effects it will have, whether positive or negative. Through our research, we’ve compiled a list of pros, cons, and risks to keep in mind when deciding if coding is right for you and your students.

Pros: 

  • Coding develops thinking skills. It requires high levels of activity in multiple areas of the brain and develops logical, process-oriented thinking.
  • Coding develops creativity. Working on coding projects inspires imagination. It challenges kids to think outside the box and solve problems in a creative way.
  • Coding builds confidence. Designing and implementing coding projects from scratch and sharing self-made products with family and friends, allows every child to experience the feeling of success.
  • Coding contributes to success in other fields. Learning to code provides a new way of thinking about abstract mathematical concepts. It encourages creative thinking. It teaches students a new, highly logical way of communicating. As a result, it supports student success in such diverse fields as math, art and reading comprehension.
  • Coding leads to innovation. Coding is everywhere. It has revolutionized the way we consume knowledge, work and connect with people. Learned at a young age, coding gives young people the tools they will need to play an active role as innovators in this new digital world.
  • Coding is best learned at a young age. Learning to code is often compared to learning a new language; Kids learn faster, understand better and absorb more when they’re taught coding at a young age.

Cons: 

  • The programs selected and the way they’re used must be intentional – not simply coding for the sake of coding. Educators must be careful to plan clear objectives.
  • It adds additional screen time to the students’ day.

Risks: 

  • Just like with any tech, glitches or programs being down is always a risk.
  • As with any medium, overuse can make students’ attitude towards it negative.

So you’ve decided coding might be the right fit for your classroom… now how do you integrate it to get the most out of it?

Math

It’s no surprise that math is not everyone’s favourite subject – between the abstract concepts, often dry material, and traditionally pen-to-paper style of teaching, it can be a tough subject for many learners who don’t connect well to that.

Visualization of abstract concepts: Math concepts are abstract and often difficult for students to grasp. Trying to make sense of imaginary numbers and imaginary operations can be a lot for students to take in and work through, especially if it’s new info or if they aren’t able to make sense of the concept. This unfortunately common confusion can be enough to turn students off math altogether. Coding, like manipulatives, is a great tool to be able to make this abstraction tangible. Being able to represent numbers and operations (actions) through visuals can help students makes sense of what they’re doing.

Problem-solving and critical thinking skills: Coding is an applied way to teach mathematical thinking. Like putting together a puzzle, it requires educated guessing, reasoning, analysing the data, and problem solving to get the desired result. Students are required to make sense of the given data and work through it using applicable strategies to reach their end goal. These opportunities to build and practice their thinking skills can easily be exercised in a more traditional math lesson, benefiting all types of math instruction.

Math made fun!: As mentioned before, it’s no shock that math is not every student’s favourite class. Here’s where coding comes in… it offers a huge variety of programs, games, and tools to take a (potentially) dull subject like math and flip it on its head. Using the same ideas that are in an elementary math lesson, coding programs disguise these concepts as creative games that students WANT to play!

Motivation: Piggy-backing on the fun of coding, these programs create very real motivation for your students to continue practicing their problem-solving. In the style of many electronic games, there are rewards, levels, and pay-offs for completing tasks and quests. I’m sure many of us know from our own experience how much of a hook succeeding in games can be. This feeling of accomplishment within the programs can create a hunger for more challenges, bigger projects, and (secretly) more math!

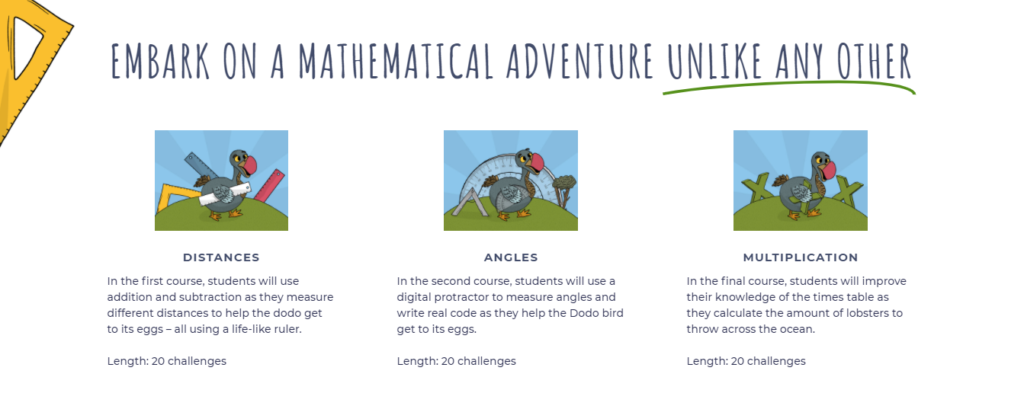
A fantastic program I found through Code Monkey is the game Dodo Does Math. This is a great fit for a grade 2-4 classroom, as it uses the following concepts, all while introducing coding in a simple and fun format.
Literacy

It is said by some that “coding is the new literacy”. The function of literacy is to engage in new ways of thinking and new ways of communicating and expressing ideas. Much like coding, developing literacy requires obtaining new skills.

When learning a language, one learns how to speak and listen. When learning text, one learns to read and write. However, when learning computers, one only learns how to use them, not program them. Most rules of the digital world are made by others, so we don’t really know how to create it.

Teaching coding is not a new idea, and the workforce desperately needs coders. Being familiar with coding will help kids to navigate and understand an ever changing digital world. Learning coding teaches kids how to break down big ideas into something that is easy to understand and communicate. It helps them to understand how the smaller parts of something fits together to form the whole.

The downside to learning coding, however, is that technology changes very quickly and nothing is the same for very long. Even though it is a useful skill, no one will ever be able to be entirely up-to-date because there will always be a newer and faster way to code. 

Coding, like learning a new language, takes a lot of time and patience. There a few ways that kids can learn how to code. Scratchjr allows kids to create their own video game worlds by breaking down the different parts. It is a great way to boost their creative thinking. There is one mini game on the website called ‘conversation’ in which kids must type in messages and send them around their virtual classroom. This can help to prompt their spelling, grammar, and coding fluency. There are also several coding camps that people can take, which range from absolute beginner to much more advanced, on a variety of subjects, including literacy.

Creativity & Storytelling

Coding can give students a whole new realm to create in. The endless possibilities that come along with coding gives students room to grow rather than stunting them. This is one of the very few resources that allows us educators the opportunity to never have to worry about saying no. Coding leaves the door to imagination land completely open for students and all they have to do is figure out how to do it. 

Creativity in Coding: Coding teaches students to experiment, explore their ideas, question their assumptions, make mistakes, and learn how to fix them. Teaching students to persevere when their ideas are met with a roadblock helps the overall growth of creativity as skill. Coding sites, such as Scratch, are providing the kind of technical, creative, and social support needed for adolescents to develop skills and discipline their creative imaginations. Using sites such as Scratch has students spending time reaching the outcome they are looking for, therefore, teaching students patience in terms of work. This can be an extremely useful tool as students develop their creative minds. If children are taught that they can figure out ways to bring their ideas into existence no matter how many roadblocks are thrown at them, then we will produce a generation that finds solutions to anything they are passionate about. These types of skills also help children follow through with things such as school work or chores at home. Coding skills help students pursue their creativity, which I believe is reason enough to introduce it into the classroom.

Storytelling Skills: 

Sequence and Structure: Of course, sometimes there is not always space for just creativity alone so we must also take into account just how much coding helps students learn the importance of sequence, structure, and clarity of expression which is crucial in storytelling. When students work on a coding project they must set up the codes in a way which will allow what they are working on to play out sequentially. Scratch is a great way to have students work on a sequential, structured story. In the program Scratch students must place coding blocks in the correct order so that the story they are creating plays in the way which they please. If they place a block in the wrong spot it can quite often mess up most of the story they are working on. Students learning to deal with programming aspects such as debugging scripts and coordinating coding sequences are a big part of a story’s success. The program Scratch will help students learn how to properly set up their stories in a way which makes sense and can be understood by all. 

Clarity of Expression: Students can learn clarity of expression by using coding as they need to know exactly what they want their characters to do. Once they know what they want their characters to do then they can start creating the story. I imagine the first part of the story coding process would be some sort of brainstorming activity which also seems to be the first step in writing a story most of the time. If the younger grades have trouble with a brainstorming activity then you could also have them work in pairs to draw out their story and create it together. As many stories that are coded will not work if students are not clear about their intentions this will have students reflecting and finding the parts of their stories which are not clear enough to be understood by others. 

This video includes a quick tutorial of simple ways which students can use the program Scratch to express their creativity and storytelling skills


There is a reason coding has become more and more popular in schools. From creativity and perseverance, to logical thinking and problem solving, the benefits of introducing coding in the elementary classroom are diverse and hugely beneficial across a variety of subjects. While we have only detailed three broad academic concepts, coding programs can be successfully related to almost any curricular content out there. If you have not already, it’s absolutely worth looking into how to introduce this relevant skill to your students, opening up a whole new world of learning for them.


References

Read More

Equity through technology

This week’s class was lead by guest speaker, Chantelle Morvay-Adams, from BCEdAccess. BCEdAccess is volunteer-run organization helping to bring equitable access to education for families of students with disabilities and complex learners. Chantelle plays a big role in the organization, bringing her own familial experiences into her advocacy, pushing for true inclusion within school communities.

Hearing her speak from a professional stance, as well as personal through her experiences as a parent navigating these issues, was such a treat as a future-teacher. I was furiously scribbling down notes, as there was just so much good information to remember! These are some of the bigger points I took away from her chat with us:

Lack of Tech

While this didn’t come as much of a surprise, it wasn’t something I’d thought a huge amount about yet  – the lack of technology available for those who would benefit from it most. For learner’s with certain disabilities or designations, diagnosed or not, having tools available for them to successfully participate at, or close to, grade level makes a world of difference in their continued learning, social wellbeing, and personal feelings towards school and learning.
This helpful tech, whether it be certain seating for a child with ADHD, or a keyboard for a student who had difficulties writing, is often difficult to acquire. The job of advocate lands on the teacher and the parent to push for these tools.

Lack of Tech Support

Even if/when the tech is available to use, there is often a huge learning curve in terms of how to use it.
Teachers may not know what specific approach or tool is best for a student and there is no go-to person for technology at schools.
Parents are often suggested to use certain tools, with no guide or prior knowledge of how to use them. Especially for parents who may be working through the initial struggle of a fresh diagnosis, this can add another layer of overwhelm to an already tough situation. A way that schools can help with this, may be to offer videos or tutorials on how to use specific pieces of technology.

Communication

Through any step in the process of working with a learner who has a learning disability (diagnosed or not), it’s crucial to keep communication open between teacher and student, and teacher and parent.

One of the best ways to get through to a student and figure out their struggles is to simply ask: What they liked/didn’t like? What works well for them? What is frustrating for them? This can help you gauge what approaches to take or tools to use to help them thrive in class.

For parents, creating an open, and inviting channel of communication can help both parties feel comfortable reaching out. This can be a tricky situation to navigate though, as every family will be at a different stage of their journey. One parent may be working with you and pushing towards getting helpful resources, another may still be working through a new diagnosis and seemingly less receptive, as they’re already feeling overwhelmed, and another parent may be refusing test and diagnosis all together. Regardless of where they are at, it’s important, as their child’s teacher, to read the situation and respond accordingly, but always have the  door open for if/when they’re read to talk.

Bake 5 – Doughnuts

Honestly, I’m not the biggest fan of doughnuts. They’re fine, but I never really crave them – they’re usually too sweet, sit too heavy, and taste a bit too plain. But in an attempt to think of new things to test out my sourdough on, they seemed like a good experiment!

There weren’t that many vegan sourdough doughnut recipes that popped up in my search, but this one from Fare Isle looked promising. As I usually do, I followed the methods to a tee, but took some liberties with ingredients to have it suite my pantry contents and personal taste.

As also, I am doing the same as last week’s bake, where I only make one batch using one of my starters. This is, again, due to not needing a ridiculous amount of sweets in the house, but also having limited amounts of certain ingredients.

Recipe
  • 100 g whole-wheat sourdough starter
  • 650 g all-purpose flour
  • 1 tsp salt
  • 1/2 cup vegan butter
  • 1-1/4 cup non-diary milk
  • 1/4 cup water
  • 3 tbsp sugar
  • neutral oil for frying

Vanilla Glaze

  • 1 cup powdered sugar
  • 2 tablespoons non-dairy milk
  • 2 tsp vanilla

In a small sauce pan, melt butter over medium heat. Remove from heat and add in milk, water, and sugar. Stir to dissolve.

In a stand mixer set up with the dough hook attachment, mix the melted butter mixture with the starter and salt until combined.

On low speed, had half the flour. Once incorporated, add the other half. Mix for 5 minutes until a smooth dough forms.

Let the dough rest, covered in a bowl, until it’s doubled in volume, about 8-10 hours.

After it has proofed, turn dough onto floured surface and roll to 1/2″ thick. Cut dough into circles and cut out the smaller inner circle if desired. Rework and roll the scraps to make more doughnuts.

Place cut-out dough on a lined baking sheet and let rest, covered, for 1 hour.

After about 50 minutes, begin preparing the frying oil. In a heavy bottomed pot, heat oil to 375F.  For my stove, I set the element to medium heat (5) and once it reached the right temperature, reduced it to med-low heat (4) to avoid it getting too hot.

Fry doughnuts, a few at a time, for 45 seconds per side, until golden. Place on cooling rack.

Once doughnuts are cooled, mix together glaze and dunk the tops of the doughnuts it. Place back on rack to drip and set.

Thoughts

I’m pretty confident in the kitchen, but frying (especially deep frying) things is scary for me. Hot oil freaks me out and I always imagine something bad happening, so this was definitely out of my comfort zone. The frying process was not my favourite, but the mixing and cutting of the doughnuts was a lot of fun.

For sourdough flavour, this was probably the most subtle result I’ve had so far. Usually after whatever dough I’m making has proofed, the sour smell is overwhelming, but I really couldn’t smell it much for this one. Luckily that sour taste was there, although still subtle. I was using my whole-wheat starter, so it added a salty, grainy twist to the plain dough, which was a nice touch for something that is usually quite sweet. I do think the all-purpose starter would give it a more fun, sour twist, which would go well with a sweet glaze – but I can always try that out next time.

All-in-all, I’m happy with the results! I would make this recipe again if I was ever itching for a doughnut.

-Megan B.

Bake 4 – Brownies

This week’s bake looked a little bit different than my past ones…
While my inquiry has been more geared towards comparing the two starters, caring for them in order to do these comparisons and keep up with the weekly baking has left me with a lot of discarded sourdough starter. I really hate tossing perfectly good ingredients out, so I though it was about time for me to figure out something tasty and fun to do with it!

A quick online search, and a hankering for chocolate, brought me to this fabulous brownie recipe. Using the discard in the place of where some of the flour and liquid would be added, this recipe immediately struck me as doable and delicious – I had to give it a try.

Recipe

Following Izy Hossack’s recipe exactly, I made only slight changes based on the ingredients I had available in my kitchen, which I’ve written in my version below.

  • 120g aquafaba
  • 1/4 tsp cream of tartar
  • 200g sugar
  • 100g vegan butter
  • 150g semi-sweet chocolate
  • 200g AP sourdough discard
  • 1 tsp vanilla extract
  • 50g unsweetened cocoa powder
  • 70g flour
  • 30g cornstarch
  • 1/4 tsp baking soda
  • 1/4 tsp sea salt

In the bowl of a stand mixer, whisk the aquafaba and cream of tartar on high speed until it makes a think, pale foam.
Add in sugar, a few tbsp at a time.
Whisk on high for 5 more minutes, until most of the sugar is dissolved.

Over low heat, warm the vegan butter and chocolate until it’s mostly melted.
Remove from heat and stir until it become a smooth, creamy mixture.
Stir in the sourdough discard and vanilla.

Preheat oven to 350F and prepare an 8×8 baking pan.
Add about 1/4 of the aquafaba mixture into the melted chocolate. Stir until combined.
Pour the chocolate mixture into the bowl of the aquafaba. Add in the rest of the ingredients and very gently fold to combine.
Once everything is combined, pour into prepared pan and bake for 30 mins.

Thoughts

I was honestly pretty unsure how a sourdough brownie would turnout – the thought of a tangy brownie just was not computing in my mind, which was part of the fun of trying this recipe out.
During the mixing process, the sourdough aroma was STRONG – it was giving off a pretty intense sour milk/buttermilk smell, which weirdly worked really nicely with the smell of the warm, melty chocolate.

First impression of the final product: two thumbs up from myself and my husband. The milky, tangy taste was there from the starter, but was more of a side note to the strong flavours of the brownie itself. The balance was great, the texture was fudgy in the middle and slightly crunchy on the top and edges, and the sweetness wasn’t too overpowering (I reduced the sugar).

This was a really fun recipe to make, and a nice change from the usual sourdough recipe process. The starter was added simply for flavour and to reduce waste, as opposed to being a leavening agent, so there were no technical worries, as there usually are when I  try out sourdough recipes.

I also just used my all-purpose starter for this recipe so far, instead of doing two batches as I normally do to compare – I really didn’t need two full trays of brownies in the house all at once! I took note of the flavours of this bake and will compare when I make this recipe next with the whole-wheat starter.

-Megan B.

Coding platforms

Coding is being used more and more in classrooms as it becomes more relevant in today’s world. It also has been shown to provide many benefits including:

  • Providing logic for things we use and see in our everyday lives
  • Develops problem solving and computational thinking
  • Builds up a job skill
  • Can be fun!
Coding in the classroom

When many of us think of coding, this is what comes to mind…

New Coding Language
"New Coding Language" by Matrixizationized is licensed with CC BY 2.0. To view a copy of this license, visit https://creativecommons.org/licenses/by/2.0/

But there are tons of programs, websites, and manipulatives that are making learning coding more accessible and fun for young learners.  Instead of simply focusing on coding languages and rows and rows of symbols, these new programs are focusing on aspects of coding like putting pieces of logic together to make a sequence or presenting the learning as a game to get students into it. Some sites, like CSunplugged, are even taking the screentime out of the equation, while teaching the principles of coding without being online!

Glitch

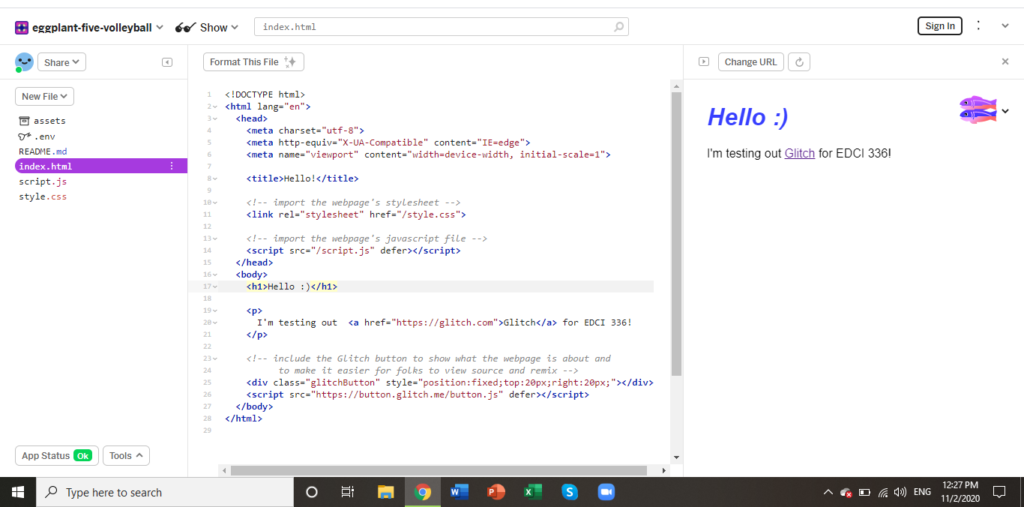
During our breakout rooms, I spent the most time working with Glitch.

While I could see it being (maybe) easy to use and fun for someone with more coding knowledge, it was too much for me and my group mates to work with. We had no prior experience, so we were feeling pretty lost with it. This is definitely a program for a more experienced learner, who already knows the basics of coding language and some know-how of formatting it.  Without this, there not really much that can be accomplished.

We all agreed that this was a program suitable for older learners (upper high school) with previous experience, likely in a coding elective.

Other group reported back with some rave reviews for programs like Grasshopper, Scratch, and CSunplugged, which would all be better for younger students.

Thoughts

I really love the idea of teaching coding in the classroom! I completely agree that it’s hugely beneficial for all the reasons listed above. However, I’m someone that is a little leery of adding screentime in the classroom (I’d say I personally lean more towards a nature/outdoor school approach to things), so while some of the websites can be fun and effective, I don’t know about using them often enough to produce much benefit. Programs like CS unplugged or using coding manipulatives that the students can actually get their hands on is something that is so exciting to me, and something I would happily bring introduce to a class.

-Megan B.

Bake 3 – Bagels

This week was feeling like a bagel kind of week, so that’s what I decided to make!

I’ve only made bagels a handful of time a few years ago, but never with sourdough, so this was going to be another week of experimenting, learning, and crossing fingers that I’d end up with a half decent product. I was still riding the confidence from last week’s bake, so I was feeling pretty good going into bagel-making. Saturday, Halloween, I dove into this new challenge, excited to see the turn-out come Sunday morning.

Recipe

I followed the sourdough recipe from Little Spoon Farm, cutting it in half as I was making two different batches, and making minor adjustments which I’ve included in my recipe below. Each batch makes 4 bagels (so I ended up with 8 total), but it’s easy enough to multiply to make more.

  • 62 g sourdough starter
  • 125g water
  • 20g (+1 tbsp for boiling) sugar
  • 5g sea salt
  • 50g whole wheat flour
  • 200g AP flour

In a bowl, stir together starter, water and sugar. Add salt and flour until moderately incorporated.

Using a stand mixer with a dough hook, or kneading by hand, work dough for about 6 minutes.
Place back in a bowl, cover with a dish towel, and let rest for 12 hours.

After 12 hours, turn dough onto counter and divide into 4 equal parts. Form each part into a bagel shape.  Once done, place on a parchment or silpat lined baking sheet.
Cover tray with dish towel and let rest for 30-60 mins.

Preheat oven to 425F.
Fill a large pot about 3/4 full of water. Add 1 tbsp of sugar and boil.
Once boiling, put in a few bagels at a time, cooking 2 minutes per side. Put back on baking sheet when they’re done.

When all bagels are boiled, bake for 20-25 minutes.

Thoughts

The entire recipe and process was pretty darn simple and easy to follow!

After the 12 hour rise, the sourdough aroma was STRONG (in a good way). The end result was nowhere near as sour as I thought it would be based on the smell, which was a tad disappointing, but there was still decent sourdough flavour in both batches.

The Results

Whole-Wheat

Like my bake from a few weeks ago, the whole-wheat starter produced a saltier, more umami flavour in the bagel. There was a bit of a sourdough tang, I would have liked it to be a bit stronger, but it was definitely still noticeable.

White/All-Purpose

The difference between this and the whole-wheat batch was staggering. Despite having the same look and texture, the flavour was very different. The AP starter produced a lighter, brighter flavour. There was a lot more tang that had a clear sour taste. While the whole-wheat was more salty, the AP starter created a sweet taste

This bake was the most exciting in terms of sourdough production – the flavour profiles of the two starters are really developing and becoming so clearly different.

This bagel recipe was also a great success – it got two thumbs up from my husband and my son, so I’ll be making it again soon. Hopefully I can work out my shaping technique to get some more uniform looking bagels!

-Megan B.

EdCamp

This week’s class was the first time I’d ever heard of EdCamp, but after our time learning about it and experiencing our own mini version of it, I’m absolutely interested in learning more and participating in it again.

What is EdCamp?

EdCamp is a model of Pro-D conference (on “unconference”) that centres around what educators want to learn about. It’s participant-driven, with no special guests, experts, or key speakers leading, but rather teachers proposing discussion topics, engaging in discussion, and sharing experiences with each other.

The hope of this model is that it is more engaging for those attending, and gives the educators more of what they need and are interested in learning about.
Participants can switch between discussion groups as they want, tailoring their learning and their day to benefit them most.

-Megan B.

Bake 2 – Croissants

Seeing as how I have not yet mastered basic sourdough bread, the next logical step on this journey would be to try and make the most difficult sourdough pastry I could possibly think of, right?

I’ve been feeling pretty bread-ed out lately and needed a change… In comes my hankering for a croissant. It’s been about 7 years since I’ve had a croissant. I absolutely loved them – warm and flakey, topped with a bit of raspberry jam – but have not yet been able to find a vegan version during these 7 years (red flag #1). So I thought, seeing as though I’m already tackling some difficult baking, might as well add that challenge to the list and make some vegan sourdough croissants! While I 100% understand that I’m setting myself up for failure, the experimentation and challenge of this task is too good to pass up.

Recipe

The search for a vegan sourdough croissant recipe came up with next to no results (red flag #2), but I stumbled upon one gem of a recipe on a vegan baking subreddit that looked promising.  I cut the recipe in half (the measurements I used are listed in the recipe below) and made one half batch with my whole-wheat starter, and one with my all-purpose starter, following the exact same measurements and methods for both.

  • 210g AP flour
  • 5g salt
  • 25g sugar
  • 70g sourdough starter
  • 60g alternative milk
  • 60g warm water
  • 25g + 100g vegan butter

Thinly slice 100g of butter and put it in the freezer.

Mix the dry ingredients together in a bowl.
Add the milk, water, and starter. Once mixed to a rough dough, knead for about 5 mins.
Add in 25g of butter, kneading for another 5 mins until incorporated.
Put dough in a bowl, cover and allow to rise for 2-3 hours at room temperature.

Roll the chilled dough into a rectangle, so that it about 1 cm thick.
Place frozen butter over 2/3 of the dough.
Fold the empty third over the middle. Fold another third on top of that. The stack will now be dough/butter/dough/butter/dough.
On a gently floured surface, roll stack into a rectangle about 1cm thick.
Fold the two ends towards the middle (but not overlapping). Fold in half the other way.
Wrap in saran wrap and refrigerate for 30 minutes.

Roll out chilled dough again to about 1cm thick. fold in thirds again.
Re wrap in saran and refrigerate for 1 hour.

Roll out chilled dough to 1cm thick. Cut out triangles, about 10 cm at the base and 2cm at the sides.
Gently stretch out the base of the triangle. Roll the dough, starting at the flat end of the base to the tip of the triangle. Repeat for all the triangles.
Place the croissants on a tray lined with parchment paper or a silpat mat. Place them so that the tip is on the bottom of the pastry.

Proof the croissants for 2-3 hours. In the final hour, preheat oven to 425 F.

Bake for 10 minutes at 425F, then reduce to 400F for 18 minutes.

Thoughts

The recipe, although a lot of steps, was simple and easy to follow. I was very pleasantly surprised at how good the laminated dough looked after

I rolled the croissants. I honestly didn’t think I’d get that clean of layers while I was making it. The vegan butter seems to have a higher water content and melts a bit easier than regular butter, so I was worried the melting/temperature would negatively impact the lamination process.

The Results

I CANNOT  CONTAIN MY EXCITEMENT – They worked!!! I really truly  can’t believe the beautiful croissants that came out of this experiment of a bake.

Whole -Wheat

Surprisingly, this batch rose a tad less during proofing, so I was nervous about how the sourdough was doing in there, but the oven spring really picked up the slack.
As far as flavour goes, the whole-wheat starter really shone through. The tang of the sourdough was subtle, but it was accompanied by a really beautiful nutty flavour, which my husband and I both thought was a great addition to the plain, buttery croissant taste.

White/All-Purpose

During the entire process, the dough of this batch was a bit easier to work with. After cutting and rolling, the lamination also appeared to be more prominently displayed. The rise during proofing was perfect – I definitely had more more confidence that this batch would turn out better because the starter seemed to give it more rise.
The sourdough flavour in this batch was more true and more pronounced without being too sour (which I wouldn’t want in a croissant.


I am still in shock at how this bake turned out, happy and intrigued with the specific sourdough flavours that came through in each batch, and so inspired to make more croissants!