Category: edci337

Multimedia Design Outline; A Beginner’s Guide to Nearpod – Assignment 4

Photo by Nearpod
Introduction to our Media Object; Nearpod.

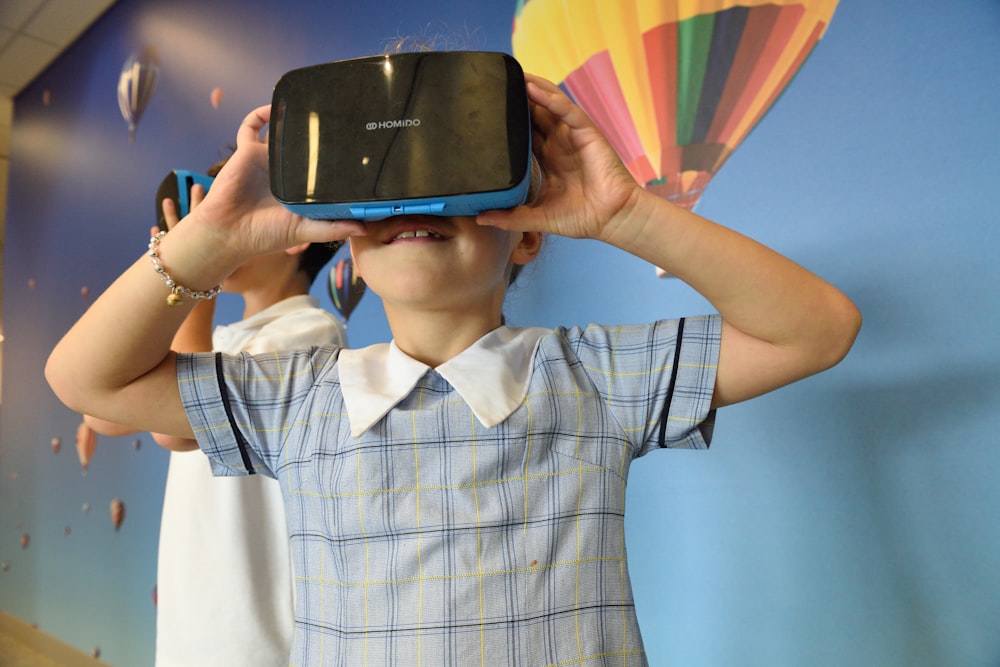
For our Multimedia Design project, we have decided to compile a series of video tutorials intended to instruct learners, primarily classroom teachers, on how to use the educational resource Nearpod to present material to students. To elaborate, Nearpod is a digital platform where teachers can upload their previously made lessons (PowerPoints, GoogleSlides, PDFs, etc.) and edit them for further interaction (Nearpod, n.d.). Choosing a premade lesson off of Nearpod’s library, or creating one from scratch on Nearpod itself are also available options (Nearpod, n.d.). Specifically, teachers can add formative assessment check-ins to gauge student understanding by incorporating quizzes, open-ended questions, and audio responses (Nearpod, n.d.). Additionally, teachers can add media such as Virtual Reality simulations or integrate relevant websites and videos to increase student engagement (Nearpod, n.d.). When it comes to content delivery, Nearpod offers 3 means; 

  1. Live participation, ideal for in-person or video-conferencing learning, where teachers control the pace of the lesson and students participate on their own devices (Nearpod, n.d.). 
  2. Student-paced, ideal for at home learning, where students progress at their own speed (Nearpod, n.d.). 
  3. Front of class, ideal for in-person learning, where teachers can project their lessons to facilitate collaborative discussions, and student devices are not needed (Nearpod, n.d.). 
Rationale

With the uncertainty and inconsistency of in-person and at home learning due to COVID-19 for teachers around the world this past year, we were inspired to to focus our assignment 4 on Nearpod as it offers a comprehensive solution by allowing each uploaded lesson to be adaptable to the given circumstances (i.e. live participation or student paced). As well, if a student was away for an extended period of time or needed extra support in terms of having a concrete copy of a lesson, Nearpod is a great course of action. We also liked how seamlessly formative assessment can be integrated into each Nearpod lesson – we recognize that oftentimes this can be a challenge for teachers, but, as made accessible through Nearpod, having check-ins actually a part of each lesson rather than an activity afterwards, that can digitally record student data, would make evaluation easier.

Overview

To educate learners about Nearpod, we have created 5 video tutorials, introducing the basic, necessary skills of: creating a Nearpod account, navigating the Nearpod library to find and save a pre-made lesson, editing existing features within a saved Nearpod lesson, adding a video to a saved Nearpod lesson, understanding the difference between a live participation and student-paced Nearpod lesson, and giving students access to a Nearpod lesson. We would ask all learners to follow along with our videos, stopping when needed, to take part in a more hands-on experience, and to walk away confident using Nearpod on their own. 

Learning Outcomes

Each learning outcome below has a corresponding video tutorial that learners can follow along with to help them familiarize themselves with Nearpod and its basic features.

By the end of this topic, learner’s will be able to:

Create a Nearpod teacher account:

Navigate the Nearpod library to find and save a  pre-made lesson. Open lesson and show how a lesson can be edited (click in to show how a lesson can be changed:

Edit existing features within a saved Nearpod lesson:

Understand the difference between a student-paced and live Nearpod lesson. Give learners access to a Nearpod lesson:

Create their own Nearpod lesson using multiple tools:

Evaluation

In the last tutorial video, learners will be instructed to create their own mini Nearpod presentation using the skills learned in the prior videos. We purposefully left a degree of flexibility in the hands-on activity so that they could play with and explore the tools they feel would benefit their slides the most. The finished slides would then be posted as a blog post or emailed to the educator for assessment. We would specifically be checking that a variety of Nearpod slides were included and that they were customized to the learner’s chosen theme. This would show us if they understand how to create and edit presentations using Nearpod.

Obstacles

There are two main obstacles that we found while putting this resource together. The first being that the text is not editable in the premade Nearpod slides. It was originally planned that we would create a tutorial editing elements within premade slides, but this proved to be tough without being able to edit the written portions of them. Second, there are so many features and options to explore within Nearpod that it was tricky to widdle it down to a few key points that strung together nicely for our tutorials.

Learning Theories

 Our Multimedia Design project was made according to the model of experiential learning, whose goal is to engage learners in direct experience  to increase their knowledge and skill development (Queen’s Experiential Learning Hub, n.d.). Specifically, we have created video tutorials highlighting the basic competencies needed to navigate Nearpod, which learners can use as a guide to explore the website with themselves. Thus, while completing our resource, learners will be gaining hands-on practice with Nearpod, which they can later apply to their future presentations. In cohesion with the experiential learning model, and as similarly described, we have based our assignment on off of the educational theory of constructivism, which is founded on the belief that authentic learning takes place when students can actively take part in the process of meaning-making (Ertmer & Newby, 2013). The preceding implies that when a lesson is taught in a constructivist manner, students are given chances to explore, reflect, and evaluate new ways of thinking, as well as relate them to their prior knowledge (Ertmer & Newby, 2013). Thus, while we have provided video tutorials showing how to use Nearpod, they are merely a jumping off point for learners; while accessing them learners are encouraged to progress at their own pace, stopping to extend their understanding by asking questions, or take initiative by further investigating a particular topic of interest. 

Multimedia Theories and Principles

In order to create optimal learning conditions for those utilizing our project, we have adhered to three of the information processing theories touched on in EDCI 337. To elaborate, with Dual Coding Theory stating that humans store sensory input in verbal and non-verbal subsystems, our video tutorials combine audio and visual input, so that learners can receive instruction in two formats (Cognitive Theory of Multimedia Learning, 2011). We also recognize the role of active processing in a learning experience, where learners must be actively engaged to make sense of content being presented (Cognitive Theory of Multimedia Learning, 2011). So, as previously described, we have designed our resource so that individuals may experiment with Nearpod, rather than passively listening to us speak about it. Finally, in an effort to avoid overloading the working memory, which is described as finite in the Cognitive Load Theory, we have incorporated the following of Mayer’s Principles of Multimedia Learning to ensure that our work is as user-friendly to interact with as possible (Mayer & Fiorella, 2014). 

  1. Modality and multimedia principle – our video tutorials combine graphics and verbal narration (Mayer & Fiorella, 2014). 
  2. Segmenting principle – our video tutorials are presented in learner-paced segments rather than as a continuous unit (Mayer & Fiorella, 2014). 
  3. Personalization principle – our video tutorials employ a conversational style of narration rather than a formal one (Mayer & Fiorella, 2014).
  4. Image principle – we have refrained from adding a speaker’s image to our video tutorials (Mayer & Fiorella, 2014). 
References

Cognitive Theory of Multimedia Learning. (2011). In ETEC510: Design Wiki. http://etec.ctlt.ubc.ca/510wiki/Cognitive_Theory_of_Multimedia_Learning

Ertmer, P. A., & Newby, T. J. (2013). Behaviorism, cognitivism, constructivism: Comparing critical features from an instructional design perspective. Performance Improvement Quarterly, 26(2), 43-71.

Mayer, R., & Fiorella, L. (2014, August). Principles for Reducing Extraneous Processing in Multimedia Learning: Coherence, Signaling, Redundancy, Spatial Contiguity, and Temporal Contiguity Principles. In R. Mayer (Ed.), The Cambridge Handbook of Multimedia Learning (Cambridge Handbooks in Psychology, pp. 279-315). Cambridge: Cambridge University Press. doi:10.1017/CBO9781139547369.015

Nearpod. (n.d.) How Nearpod Works. https://nearpod.com/how-nearpod-works

Queen’s Experiential Learning Hub. (n.d.). https://www.queensu.ca/experientiallearninghub/about/what-experiential-learning

Gamification – Community Contributions

Hi Yiran,

It’s incredible how much things can change in such a short amount of time! My parents were similar to yours in that they did not love the idea of my brother and I playing video games. They saw it the same as watching tv – a mindless activity that was just for fun. And now here we find ourselves today, purposefully incorporating games into learning!
I love the point you bring up about games and communication. Besides the learning that can stem from the game itself, there can be a strong social aspect to many games. Whether cooperative or simply communicative, these are additional strengths and skills that can make the games more appealing for learners and boost the benefits of incorporating them mindfully into lessons.

Gamification and Game-Based Learning

What a spark of inspiration this week’s topic is! I am a huge fan of using games and elements of play in the classroom and, although few, I have great memories of participating in gamification and game-based scenarios when I was in late elementary and middle school.

After reading and watching the learning resources this week, the comedic panel game show, Taskmaster, came to mind. In a recent episode, the contestants participated in a “choose your own adventure”-type group task, in which they had to make a choice of which task card to select, then complete the task on the card to continue on to the next assigned location/task.

Example begins at 25:17

I imagine this kind of fun, interactive game-based group activity but with questions or tasks catered to a given unit or lesson. The scale of the game, the questions/activities themselves, the technology incorporated, and the points systems (if you were to choose to have one) could be completely flexible and open for modification to meet all learners and subjects. But ultimately, the game could remain an exciting active learning experience, as the students would be discussing, problem solving, and working together to complete the objective (What Is Active Learning, n.d.).

With elements of both gamification and game-based learning, the hope would be that the intrinsic motivation for students to want to participate in the learning would be high (Why Games?, 2021).

Gamification vs Game-Based Learning
Gamification vs. Play-Based Learning by EdSurge

References

EdSurge. (n.d.). Gamification vs. play-based learning. Microsoft. https://education.microsoft.com/en-us/course/9f02325a/2

Taskmaster. (2021, June 3). Taskmaster – Series 9, episode 2 | Full episode | “Butter in the microwave”. [Video]. YouTube. https://www.youtube.com/watch?v=huB67xaX47A

What is Active Learning? (n.d.). Queens University – Teaching & Learning.  https://www.queensu.ca/teachingandlearning/modules/active/04_what_is_active_learning.html

Why games? University of Toronto Libraries. (2021, January 2). https://guides.library.utoronto.ca/c.php?g=448614&p=3505475

Flow State – Community Contributions

Hi Leann,

Thanks so much for sharing about your experience of being in a state of flow! It was so interesting reading about how incredibly focused, but in a way disorientating, this experience was for you. I found it completely relatable when you mentioned that you couldn’t “feel the existence of time”, because for me this is my same experience when I get into the “flow” of what I’m doing too. Sitting down to complete a task mid-day, then noticing (what feels like only an hour or two later) that it’s dark out is weirdly fulfilling, but confusing experience!
Thank you, as well, for sharing Diane Allen’s TEDx – I had never seen it before and really enjoyed it!

Editing Video – Community Contributions

Hi Carla,

Thank you so much for sharing great additional resources on video editing. This article about creating videos in the classroom was especially helpful. Getting students involved with making and editing videos can seem like a bit of a daunting task, but this article has got me inspired. The rationales made perfect sense, the sample activities were doable but still fun, and the outlined difficulties offered important tidbits to think about.

Evaluating Media

This week’s readings and videos were fantastic in prompting me to think about how I think about technology and have been planning to use it in the classroom.
Reflecting on the activities and tasks I’ve thought up over the past year of schooling that integrate tech, there are a few that fall under the Modification and Redefinition of the SAMR Model, which is where the tech learning gets taken to the next level. But admittedly, the majority are Substitution or Augmentation. Making this realization didn’t feel great, and was an obvious result of my lack of tech comfort going into teacher education.

The SAMR model can help educators think about the role of technology in supporting learning.
“The SAMR Model” by Youki Terada

While I was able to pinpoint this an an area to improve on, it was reassuring the hear Ruben Puentedura, creator of the SAMR model, speak of how to use it and how it is most often used.

All of the examples he offers are fabulous at putting the different levels into perspective, but what is the greatest comfort after my initial panic, was him mentioning that sometimes using Substitution or Augmentation makes the most sense for a given activity.

To further this clarifying perspective, in the following interview with Puentedura he gave an example of the “fancy robotics” project that he saw students working on. He explained that it presented itself as Redefinition and that the final result was technologically impressive, but he noticed that the learners were simply looking at instructions in a text, not truly understanding what they were doing with this machine. Because of this, it cannot be said that the technology integration was truly transformative.

Example begins at 10:30 minutes

To me, this drove home the duel purpose of the SAMR model; to support learning through integrated tech, as well as avoid meaningless integration of technology. Through hearing him speak more on the topic and how to use it effectively, I feel this model is one I’d like to keep in mind when bringing technology into my future classrooms.


References

Common Sense Education. (2016, July 12). How to apply the SAMR model with Ruben Puentedura [Video]. YouTube. https://www.youtube.com/watch?v=ZQTx2UQQvbU

Terada, Y. (2020, May 4). A powerful model for gnderstanding Good tech integration. Edutopia. https://www.edutopia.org/article/powerful-model-understanding-good-tech-integration

What Is The Purpose of School?. (2020, May 31). Demystifying SAMR with Dr. Ruben Puentedura [Video]. YouTube. https://www.youtube.com/watch?v=L9h9ePoXqS8

Core Multimedia Skills – Assignment 3

A lot of the multimedia tools used in this class have been fairly new to me. This is either the first time I have used them, or some of them I have only used once or twice before. With this in mind, when it came time to select a multimedia skill to update and re-work, PowerPoint/Google Slides was an obvious choice for me as I have a lot to choose from, use them often, and I can see the room for improvement in my old catalog of work.
I selected the slides below to re-work. It is a short presentation I made for EDCI 302 about my inquiry topic of open-ended play to support oral language development in the young elementary classroom.

The issues with my original presentation can be boiled down to the following main points:

Colour

The first thing that can probably be noted from this PowerPoint is that I LOVE colour… to a fault. Reading through point #2 from the 6 Dos and Don’ts article, I was able to see that my colours were too haphazard and overpowering.
As suggested, I toned them down, still selecting “bright, playful colors” (Miller, 2019) as my topic is positive, but sticking to only two colours to create a consistent scheme.

Busyness

In a couple slides, I was able to identify some writing that did not need to be there. The slide theme itself featured many design elements and shapes that were not relevant to the presentation, so in an attempt to simplify, I parted with those too.
In removing both of these, I was able to pare down what was on the slides, reducing the extraneous cognitive load, leaving room for the audience to absorb more important information. In general, I tried to keep the slides simple and to the point, without appearing too boring.
In keeping with the idea of clarifying and making the slides easier to read, I addressed signaling by highlighting certain words when it felt necessary.

Font

Although not serifed, my original presentation featured a unique custom font for the titles and headings that added to the busyness and made it slightly more difficult to read.

To remedy this, I selected Open Sans; a simple, readable, sans serif font, and used it consistently throughout the entire presentation, again, following the advice of Amanda Miller (2019).

Photos

As an additional point, I realized there were no photos to show the concepts rather than just talk about or share them with words, so I added that in as well. I think it not only ties the presentation together a bit better, but helps get the audience into the idea of open-ended play.

All of my original slides tended to break the idea of the coherence principle. There was a lot of unnecessary, unrelated noise that distracted from the presentation. One by one, I worked to eliminate these distractions from my presentation, addressing the problem elements, and put the slides back together.
I wish I could say that being equipped with all of the fabulous information from this class made this seamless and straight forward for me, but old habits die hard. It was really difficult to push myself away from creating what I was used to. I had to focus my thinking at every step of the re-work to make sure that I was actually addressing and fixing the issues, not simply changing them into another issue.

With the new changes made, here is the updated slide deck:

Finally, I tested out the new slides with my original presentation to try out the flow and effectiveness of the new visuals with the information being presented:

Due to the time constraints of Screencastify, I had to speed through a couple slides

References

Cognitive theory of multimedia learning. (2011, July 4). In Wikipedia.  http://etec.ctlt.ubc.ca/510wiki/Cognitive_Theory_of_Multimedia_Learning

Li, K. (2018, November 24). How you should actually be using powerpoint. Hackernoon. https://hackernoon.com/powerpoint-doesnt-suck-you-do-8ea0ae5b09a9

Miller, A. (2019, June 13). 6 dos and don’ts for next-level slides, from a TED presentation expert. TED. https://ideas.ted.com/6-dos-and-donts-for-next-level-slides-from-a-ted-presentation-expert/

Shaw, A. (2016, July 14). Cognitive load theory: Structuring learning materials for maximum retention. Wiley Education Services. https://ctl.wiley.com/cognitive-load-theory-structuring-learning-materials-for-maximum-retention/

Multimedia Design for Learning

During summer, and casually throughout the year, I am lucky enough to have the amazing job working at a children’s art studio. With planned lessons and activities, but ultimately the freedom to create what they dream up with the given materials, I have very often witnessed the state of flow during these classes. What starts out as a excited, buzzing room of 6-10 year-olds, turns into a concentrated, almost silent space where imaginations and skills are on task to create.

After reading more about flow, I’ve been able to identify why this happens so regularly in this setting. First, and most obvious, is that this is an extracurricular kind of activity that the learners already have an interest in. This certainly helps them get into the flow more easily. Offering them more complex art materials to play and experiment with increases the difficulty of the project, but keeping the lesson and examples achievable helps find the sweet spot where learners are able to push themselves, and still achieve their creative goals. As shown in the diagram below, offering a challenge and catering to the right amount of skill can help find and maintain that state of flow within the activity.

Photo by Chris Perez
Screencast

I’ve done screencast recordings through Zoom, but this was my first time creating one with Screencastify. It was simple to install and use, and I loved not having the little video of myself in the corner (like Zoom does), as I often find it distracting while I record.

Augmented Reality – Community Contributions

Hi Jason,

I completely agree with you, that AR in the classroom seemed idealistic due to accessibility issues. Seeing that it can be achieved with the tools that in many schools, like the shared tablets you mentioned, was a hopeful realization that these kinds of in-class experiences can be available to all.
I do really appreciate you bringing the point up in your blog and in our pod meeting of teacher know-how and prep, though. You say that your “pessimist mind” was weighing the usefulness of AR tech in the classroom in comparison to the effort that goes into planning it, and that our pod meeting shifted this for you – I’m so glad we chatted about this aspect of it, because our group’s discussion had the opposite, but still positive, effect on me. My “optimist, but often not realistic” mind kept trying to come up with ways to incorporate more neat AR experiences into lessons, while completely downplaying the teacher prep side of things. This point was a useful reminder to not over-do it, for our and our students sake!

Infographics and Augmented Reality

boys using blue and black virtual reality headset
Photo by Stem.T4L on Unsplash
Augmented Reality

This week’s readings were very exciting for me – the idea of augmented reality is not something I’d ever explored and I had a blast learning about it, diving into the examples shared, and thinking about how I could potentially use these as a future teacher.

While I came into this topic wide-eyed and eager to learn, I was not naïve the reality that being able to use these types of tools in a classroom may be a challenge. It was for this reason that I was struck by the simplicity of Google’s AR capabilities.

Google Lens

Personally, I have used Google Lens a few times to identify plants in my garden, but it never struck me that this was a form of AR! Similar to how I’ve used it in the past, I can imagine this being a great tool to use with students to explore, identify, and gather information about things around them (local plants, insects, etc.), perhaps in the form of a guided inquiry.

Augmented Reality by Google

What really stuck me, though, was Google’s ability to show your google search in a 3D way. In the Android video below, you can see the ability to manipulate and view searched items in detail and at all angles. Even more impressive, it has the ability to place these objects, to scale, in your environment. To be able to make a bison, for example, stand in your classroom to show learners the scale in an environment they’re able to reference is an incredible, almost tangible way to share a part of a lesson like that.

After exploring Google’s AR, it became clear that these types of tools can help meet some of the Principles of Learning.

Effect: Presenting information in a new, exciting way through AR can help create a positive, memorable experience for learners.

Intensity: Creating an intense and exciting learning experience can help with student understanding and appreciation

Freedom: In the example I gave of how Google Lens might be used, this would offer students the freedom to learn while giving them options in their actions and choices while using this tool. (Principles of learning, n.d.)


Inforgaphics

In keeping with the theme of learning about bison, I’ve taken what I’ve learned in the Canva tutorials and applied it to an infographic.


References

Android. (2019, June 27). AR in search: A new way to learn https://www.youtube.com/watch?v=dK7kPiknrBY

Creative Commons Licensed Workshop Curriculum | UVic Libraries Digital Scholarship Commons. (n.d.). Retrieved February 20, 2021, from https://oac.uvic.ca/dsc/workshops/lessonplans/

Principles of learning. (n.d.). Retrieved from https://psychology.wikia.org/wiki/Principles_of_learning